This is post three in exploring the construction details of the recent Chadansu
completed by Matsu Kaze Woodworking in Hilo Hawaii.
The chadansu started out by milling the Koa for the carcass flat and true.

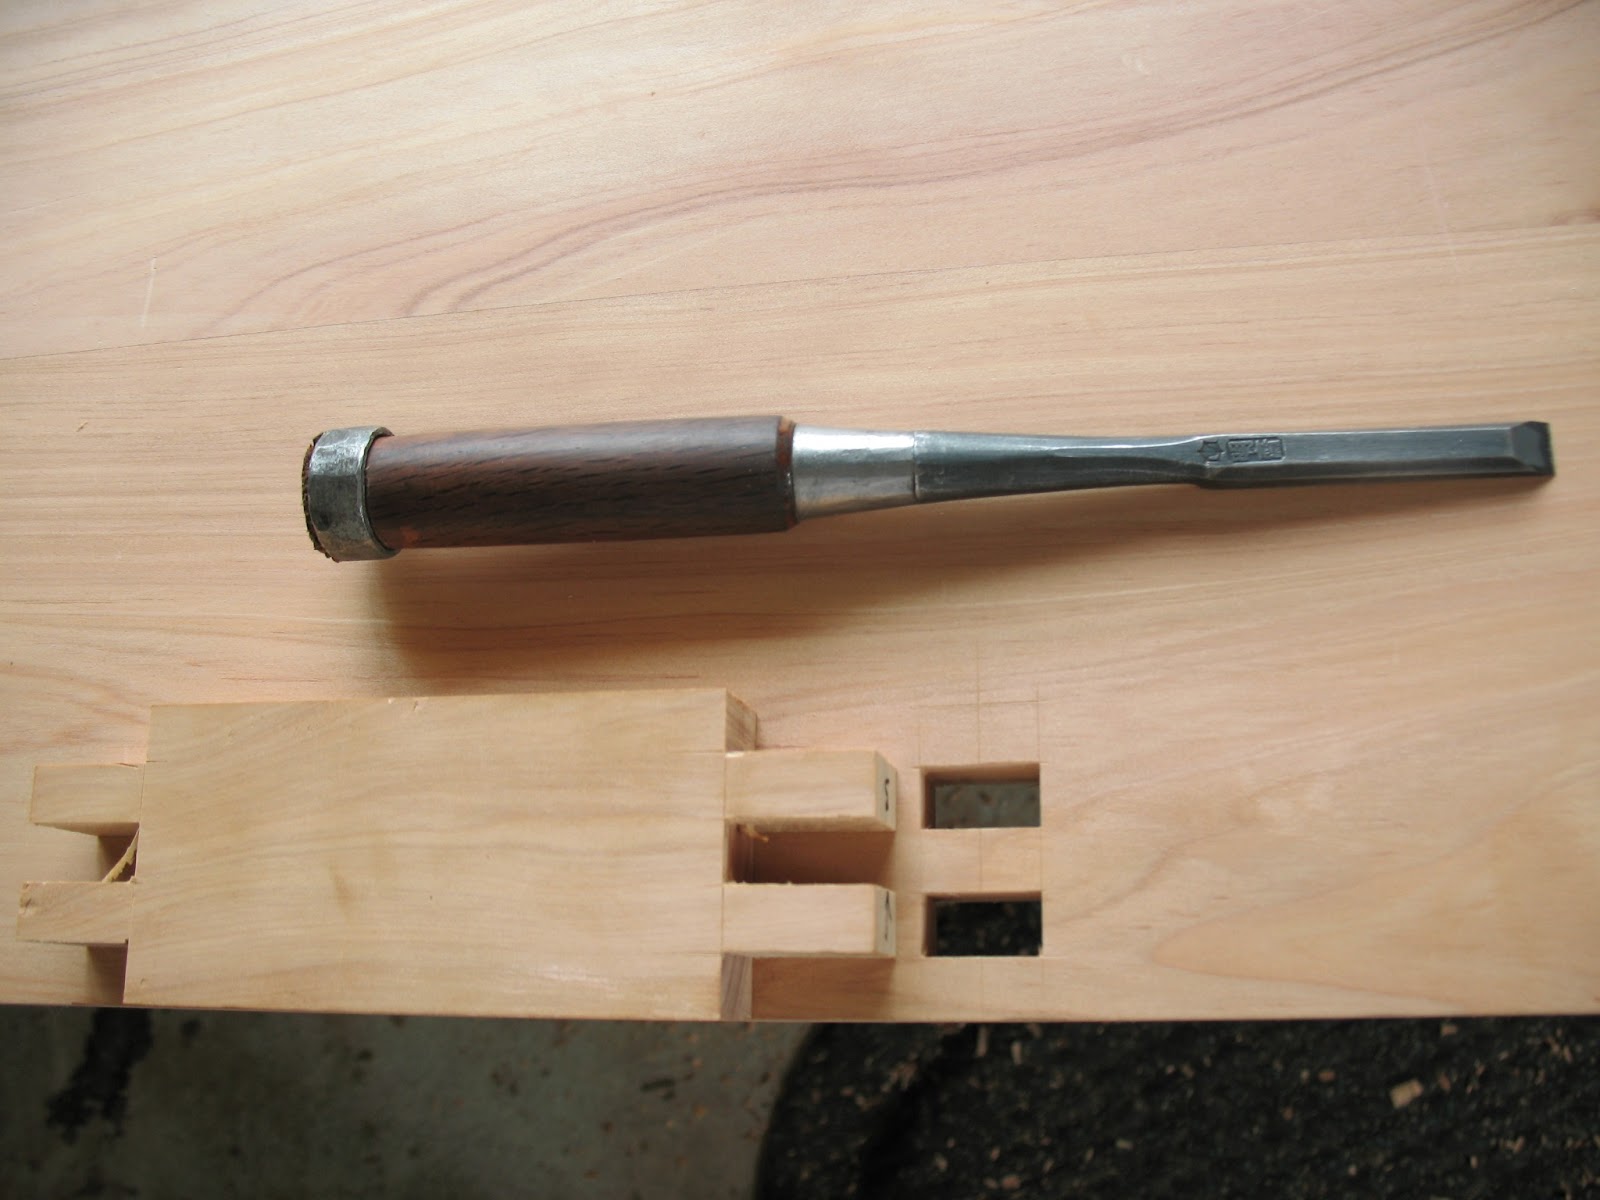
The joinery, after the grunt work is done by machines, is carried out primarily by hand.
My rule is, if you can see it, then it's done by hand.


I have come to be quite quick at it. For one off custom pieces, it is the most versatile and fastest route.

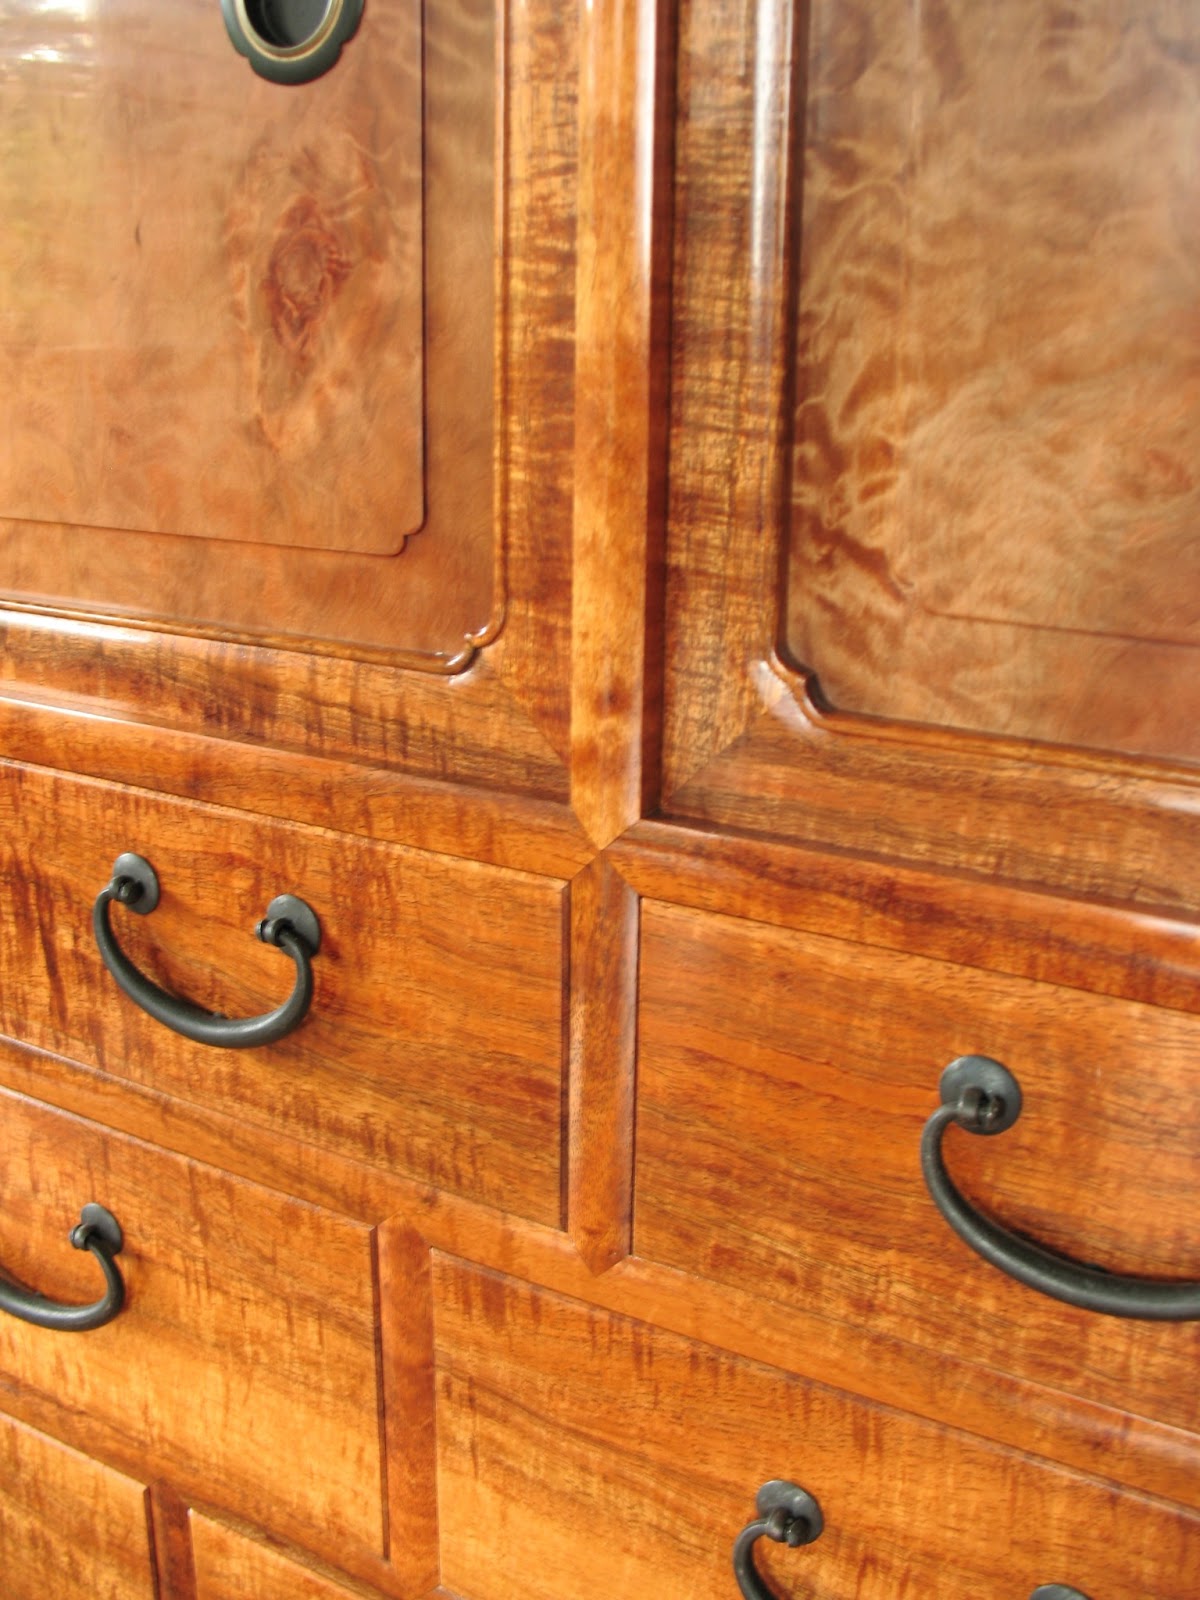
There are more than 200 dovetails in the chest. All hand cut!


Making the pins and tails smaller towards the edges creates tension, more surface area= more friction, creates greater mechanical strength in the corner and is pleasing to the eye.
For Isho Tansu I use a coarser pitch.

 .
.
Full blind sliding dovetails hold interior shelves in place above. And below is a sliding dovetail concealed in a sword tip miter joint. It was pretty tricky getting that interior drawer assembly together. It could not be test fitted with the back of the cabinet in place.
There are no screws or biscuits used, only traditional ( and not so traditional) joinery methods.

Combined with the twin tenon joint coming up thru the bottom of the sliding dovetail joint below ,

All the other vertical dividers are morticed and tenoned with twin tenons each. All wedged so that they can not be pulled apart even when the glue fails.


The drawer guides are held in place with mortice and tenon joints as well. Designed to allow expansion and contraction of the wide panels of the carcass.

In all there are about 150 mortice and tenon joints in the piece! Built to last Dynasties!
The back was made in frame and panel construction, morticed and tenoned with thru tenons combined with sword tip miters and adorned with the bead and corner detail that would tie with the decor of the front.
The goal was to create a piece that could be appreciated from all sides.


The koa used here for the back was as fine grained as any pattern grade Mahogany Beautiful creamy gold color. It polished to a high sheen with hand planes above. And with the blonde shellac finish below...

The bead on the frame was created with a small detail plane I made fashioned after an antique I had found
on the internet. The original was designed only to be used from one direction. But since I work many
gnarly woods I made mine so that it could be reversed and worked in two directions depending on the grain.Here is the original....
%5B1%5D.jpg)
%5B1%5D.jpg)
%5B1%5D.jpg)
And my rendition.....


Here's a pic of the doors using the same bead detail as the back panel. Made with the kanna above.

This was a HUGE improvement of my earlier method of creating the bead with several other small koganna , shirabiki,followed by detail knives etc.... The corners are of course carved in.
Trying to rush thru a bit now. There is much more that could be elaborated upon, please feel free to ask.
I am only highlighting the overall construction and the methods used.
The piece took some 400 hours to complete. Much of which I took the time to photodoc. I do not normally take so many gratuitous pics but this was a big piece and rather involved. Just in sheer amount of parts alone. And I thought a disc with construction images for the new owner would be nice to give.
I am already on another project , so am hoping to catch up the blog an get current.
Here's a sneak peak at the current Monkey Pod Slab Table I am building for some amazingly patient clients;^) Thanks for hanging in !

It features a 4" thick by 42~54" wide by 10 foot long Monkey Pod slab with a splayed leg base that is designed with lay out methods of Japanese convention dealing with splayed post construction such as water towers, bell towers, even step stools and saw horses. Should be a stout table, weighs in about 700lbs........
Thanks for stopping by the shop and reading about what's current at
MATSU KAZE WOODWORKING
simple devices for inspired living
H i l o H a w a i i
Thanks Dale!
ReplyDeleteCorrey,
ReplyDeletegreat to find your blog and some of your fine work! I really like the detail plane you made, and clever that it can be configured to work 2-way. I'll have to make myself one too, as I'm also finding the shaping of the bead using knives, shaves, etc. a bit tedious and tending to leave a more irregular bead than I would like. I also wonder if a pair of planes could be made to trim the irizumi portion as well(?).
Thanks for sharing your passion for the craft, and I look forward to future posts.
Saw your latest Chadansu at the Wood Show in Kawaihae. Superb design, sutekina (phenomenal) wood, incredible woodworking, mind-boggling joinery - a true work of art. It is reflective of the high quality of the work you have displayed on your web page - taken through the stratosphere. Seeing it in person trumps those images, however. I will try to conjur up a design that will add a Matsukaze piece to my household. Have some friends who are thinking along the same lines. Thank you for your high standards and craftsmanship. Ron Takata
ReplyDeleteglad you and chris hall are connected up! this piece is amazing, as always, and i am a great fan of the custom kanna approach! take care and thanks for your encouragement and inspiration, both direct and indirect...back to the forge to learn and create...
ReplyDelete